Fret buzz is a symptom, not a fault. The same rattle can come from a neck that is too straight, an action that is too low, one fret sitting proud of its neighbors, or a guitar that has dried out since you bought it. Those need four different responses, and one of them is not yours to do at home.
So this page is ordered the way the job is: find where the buzz is, measure the two numbers the makers publish, and only then decide whether you need a gauge, a wrench, or a technician.
Step 1: locate the buzz before you touch anything
Open strings buzz, fretted notes are clean. That points at the nut end or a neck that is too straight, not at your action. A capo at the first fret is the test: if the buzz disappears with the capo on, the nut slot is the suspect and that is bench work.
Buzz in the first few frets only. The classic too-little-relief symptom. A neck with no forward curve leaves the strings running too close to the frets in the middle of their swing.
Buzz everywhere, worse above the 12th fret. Usually action set too low at the saddle, sometimes combined with a neck angle problem on an acoustic.
One note, on one string, at one fret. That is a high or worn fret, and no truss rod adjustment fixes it. It needs levelling or a fret dress by someone with the tools.
Buzz only when the capo is on. That is capo pressure or placement, not setup — how to use a capo covers placing it right behind the fret and using the least pressure that works.
Step 2: the two numbers, and what the makers publish
Neck relief is the small forward bow in the neck, measured as a gap at a middle fret while the string is held down at both ends. Action is string height above a fret near the body. Every factory setup is a pair of those numbers, and three major makers publish theirs.
Fender publishes a full factory table. Relief is measured at the 8th fret with a capo at the first fret and the strings held at the last fret: .012 in for a 7.25 in fingerboard radius, .010 in for 9.5 to 12 in, and .008 in for 15 to 17 in. Fender also states the framing that most forum advice leaves out: "These are minimum specifications, meant to guide you, not to be taken as hard and fast rules."
Taylor publishes a much tighter relief figure and a different measuring method: approximately .002 to .003 in at the 7th fret, with a published maximum of .010 in, pressing the string at the 1st fret and at the 14th fret body joint. Taylor is explicit that pressing at the end of the fingerboard instead is "an incorrect technique for our instruments", which is a good reminder that a relief number means nothing without the method that produced it.
Martin's published service figures for its SC models call for .003 to .005 in relief at the 5th fret, maximum .008 in, with action at the 12th fret of .055 to .065 in on the treble side and .080 to .090 in on the bass side. Those come from a dealer service document for one model family, not a general spec for every Martin, and we have not found a published table for the standard models.
.008 to .012 in
The range of neck relief Fender publishes across its fingerboard radii
Three thousandths of an inch separates the tightest factory relief from the loosest. That is smaller than the diameter of most plain high E strings, and it is why this job starts with a feeler gauge rather than an opinion.
Published setup figures, side by side
What each maker publishes, and where it is measured| Maker | Relief | Measured at | Action | Measured at |
|---|
| Fender electric | .008–.012 in by radius | 8th fret | 3/64–5/64 in by radius | 17th fret |
| Fender acoustic | .008–.010 in by radius | 8th fret | 5/64–6/64 in | 14th fret |
| Taylor | .002–.003 in, max .010 in | 7th fret | Not published | — |
| Martin (SC service doc) | .003–.005 in, max .008 in | 5th fret | .055–.090 in | 12th fret |
Read the "measured at" columns before the numbers. Taylor's .003 in and Fender's .010 in are not disagreeing with each other; they are measurements taken at different frets by different methods on different instruments. Use the method that belongs to your guitar's maker where one exists.
The criteria for a measuring tool
1. Does it publish the increments it measures?
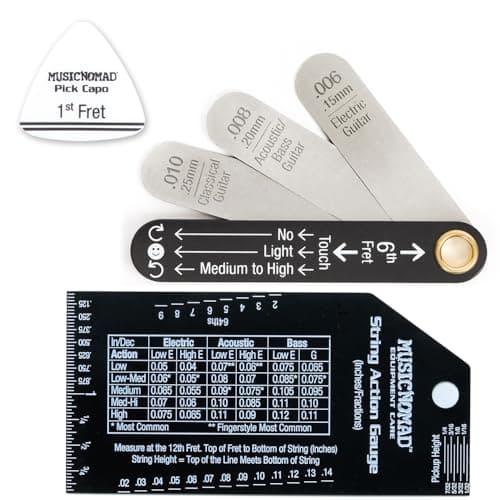
A relief gauge is only useful if you know what the blades are. MusicNomad publishes three fixed feelers — .006 in, .008 in and .010 in — labeled by instrument type. The GrooveTech kit publishes a 14-blade feeler set from 0.003 in to 0.025 in. Those two numbers are the whole reason to prefer a purpose-made tool over a ruler.
2. Does it come with a way to hold the first fret?
Every published relief method needs the string clamped at the first fret while you measure. MusicNomad includes a pick capo with its rod gauge for exactly that; GrooveTech includes a capo in the kit. Without one you need a third hand or a capo you already own.
3. Can you read it on a dark fretboard?
MusicNomad's gauges are stainless with etched markings and a black finish specifically so the numbers stay readable and, on the radius gauges, so you can see whether the string is touching. It sounds like marketing until you try to read a shiny steel rule against rosewood.
4. Does it measure in the units your maker publishes?
Fender publishes action in 64ths of an inch and relief in thousandths. Martin publishes thousandths. A gauge with inches, millimeters and 64ths together removes the conversion step where mistakes happen.
5. Do you need the wrench at all?
Measuring is safe. Turning a truss rod is the step that can damage a neck, and no maker on this page publishes a torque figure for it. Buy the gauge first, measure, and only buy a wrench if the measurement says the neck is the problem.
The picks
MusicNomad Rod Gauge and String Action set — best first measuring tool
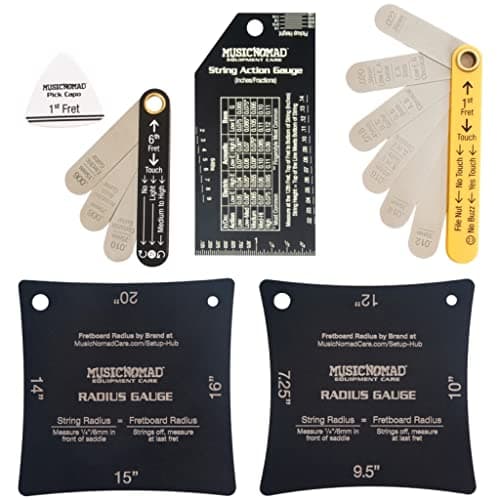
The relief gauge with three published feelers, the action gauge with three scales, and the pick capo that holds the first fret, in one purchase. That is exactly the kit the published methods ask for and nothing else.
Against it: three fixed feeler sizes is a coarse ladder if your target is Taylor's .002 to .003 in, which falls below the smallest blade. The material is not published on the listing we checked. And it measures only — you still cannot adjust anything with it.
GrooveTech Guitar Player Tech Kit — best measure-and-adjust kit
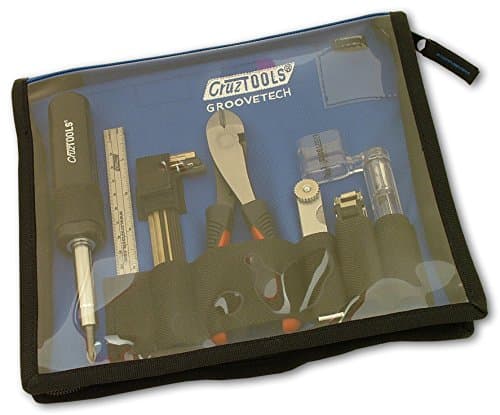
Fourteen feeler blades from 0.003 to 0.025 in, eleven color-coded hex wrenches with ball ends on the truss rod sizes, plus a capo, ruler, cutters and winder, under a limited lifetime warranty. It is the only pick here that covers Taylor's .003 in figure and the only one that both measures and turns.
Against it: the maker publishes the wrench count and the color coding but not the individual hex sizes, so you cannot confirm it fits your truss rod before buying. Loose feeler leaves are fiddlier under a string than a purpose-shaped gauge. And it duplicates a winder and cutters most players already own.
MusicNomad MN602 String Action Gauge — best action ruler on its own
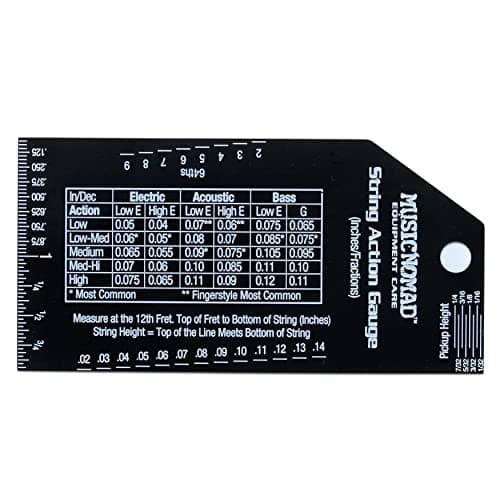
If the buzz is above the 12th fret, action is the number you need and this is the cheapest accurate way to read it, in inches, millimeters and 64ths, with a pickup ruler on the same piece of steel.
Against it: it measures action, not relief, so on its own it answers only half the question. MusicNomad does not publish the increment steps, only that three scales exist.
MusicNomad Precision Setup Gauge Set — most complete gauge set
Adds radius gauges and a nut height gauge to the relief and action tools. Radius matters here because Fender's published action and relief targets are both indexed to fingerboard radius, and most people do not know theirs.
Against it: more tool than a first buzz diagnosis needs, and the nut gauge measures a job that is bench work for most owners.
MusicNomad MN235 Truss Rod Wrench Set — best wrench coverage
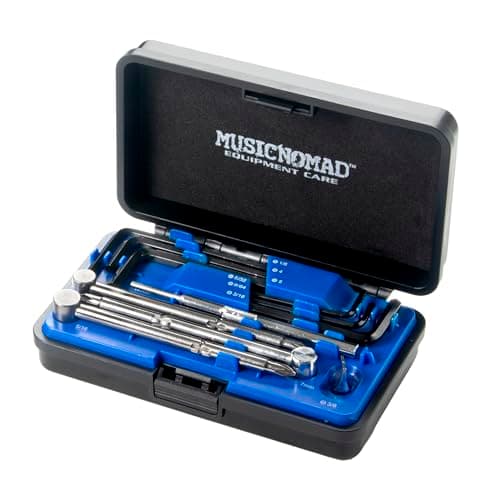
Eleven pieces with every size published, which is the honest way to buy a wrench when you do not know what your truss rod takes. Allen sizes, socket sizes and a spoke wheel tool in a small case.
Against it: it is the most expensive item here by a distance, it is wasted money if you own one guitar whose size you know, and no maker publishes how tight is too tight. If you are not confident, this is the point to stop and pay a technician.
What the measurement tells you to do
Relief below the published figure, buzz low on the neck. The neck is too straight. Loosening the truss rod a small amount adds relief. Work in small turns and let the neck settle between them.
Relief above the figure, action feels high. The neck has too much bow; tightening reduces it. That is also the first thing to check before touching the saddle, because relief and action move together.
Relief in spec, action below spec, buzz up high. The saddle or bridge is the lever, not the rod. Taylor publishes a useful ratio for acoustics: lowering the saddle by 1/32 in produces about 1/64 in less action at the 12th fret.
Buzz at one fret only. Stop. That is a fret height problem and the tools that fix it remove metal permanently. Does my guitar need a setup covers what a technician actually does for the money.
The cause nobody measures: humidity
A wooden guitar that has dried out moves, and the movement shows up as buzz that was not there last month. Taylor publishes the range it wants its guitars kept in — 40% to 60% relative humidity — and that is a number you can check for the price of a hygrometer.
If your buzz arrived with the heating season, measure the room before you adjust the neck. Guitar hygrometers covers what the makers publish for accuracy, and do I need a humidifier answers the follow-up honestly.
Two things that are not a setup problem
Dead strings. Old strings lose their even winding and rattle in ways a new set does not. How often to change strings is the cheaper first test.
A gauge change. Fitting lighter strings lowers tension and lets the neck straighten, which can produce buzz on a guitar that was fine. Elixir publishes the warning plainly: changing gauge may require adjustment to the setup of your guitar.
What we would actually buy
Diagnosing a first buzz: the MusicNomad Rod Gauge and String Action set, because it measures both numbers and includes the capo the method needs. Planning to do the adjustment yourself: the GrooveTech kit, for the 14 feeler blades and the wrenches in one pouch. Already own a relief gauge and only need height: the MN602. And if the buzz is one note at one fret, buy nothing — that is a technician's job.
What we did not doWe have not played any of this gear. Every guide in this category says it tested twenty tuners; we would rather say plainly that we tested none. What we did instead is on this page in full: published specifications with their sources, the makers' own manuals read rather than paraphrased, and a note wherever a company publishes nothing at all.